This guide will explain everything Camflare can do to enhance and simplify the video gathering process for you and your business.
I’ll walk you through all of the features and show you how to get up and running within seconds.
Before I start, let me quickly outline why Camflare exists?
Camflare was created to provide a simple way to streamline the process of gathering video and audio recordings from multiple contributors around the world. Especially useful in a global pandemic.
Think of Camflare as a recording studio for Dropbox, allowing you to create a link which you can send to as many people as you need to.
They then click the link and are instantly directed to either the mobile app or in-browser recorder which sends the completed recordings directly back to your Dropbox.
No log in, no hassle - all with just one simple link.

“ Camflare.io is an essential tool we can’t live without. It’s easy to ask people to record a video for us. We create just one link and it comes back to our Dropbox. It’s like magic! ”
Chris R - Video Professional
Once you’ve signed up and chosen your plan - you are prompted to connect your Dropbox account to Camflare.
Simply click the button, log into your Dropbox account and click allow.
This will create an app folder in your Dropbox account called ‘Camflare.io’. This is where all the files you record with Camflare will be stored.
*Connecting your Dropbox takes seconds and our platform does not see or store any of your uploaded videos locally.
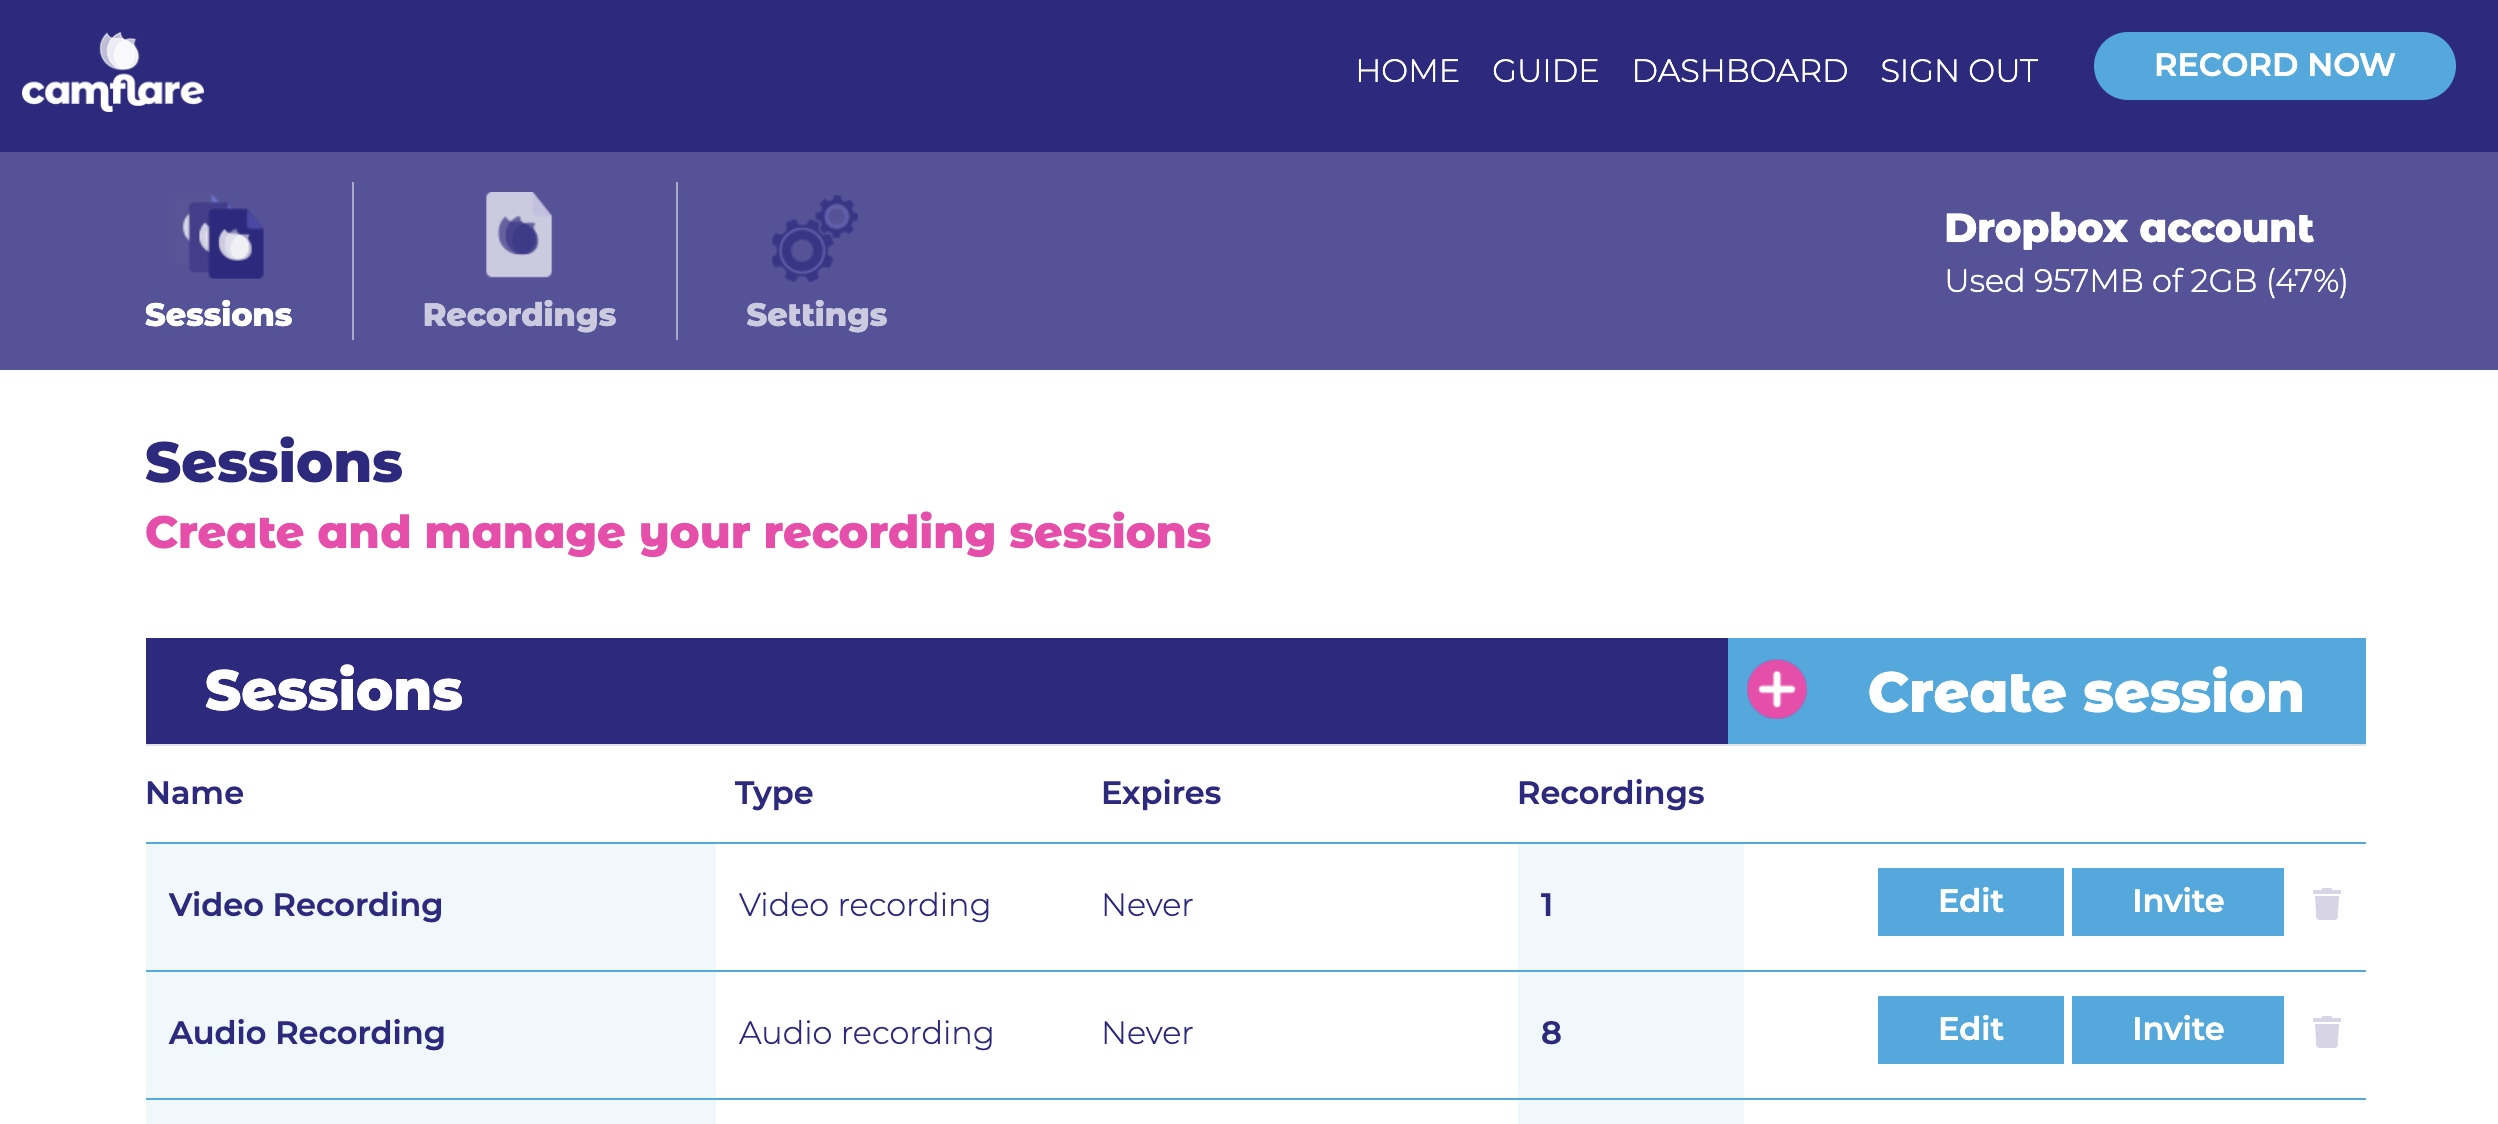
Your ‘Dashboard’ contains the Sessions, Recordings and Settings sub menus.
Sessions is where you create a recording studio to send to your contributors.
Recordings is a simple view of all the latest uploaded recordings that have been created using Camflare.
Settings is where you can change your account details and disconnect your Dropbox.
*You will notice a handy reminder of the available space in your attached Dropbox in the top right of the screen and if you haven’t yet connected a Dropbox account, you will see a ’Connect Dropbox’ button.
Click ‘Create session’, which will open a new page of settings you can specify for that session.
Let’s walk through the options as they appear in the platform.
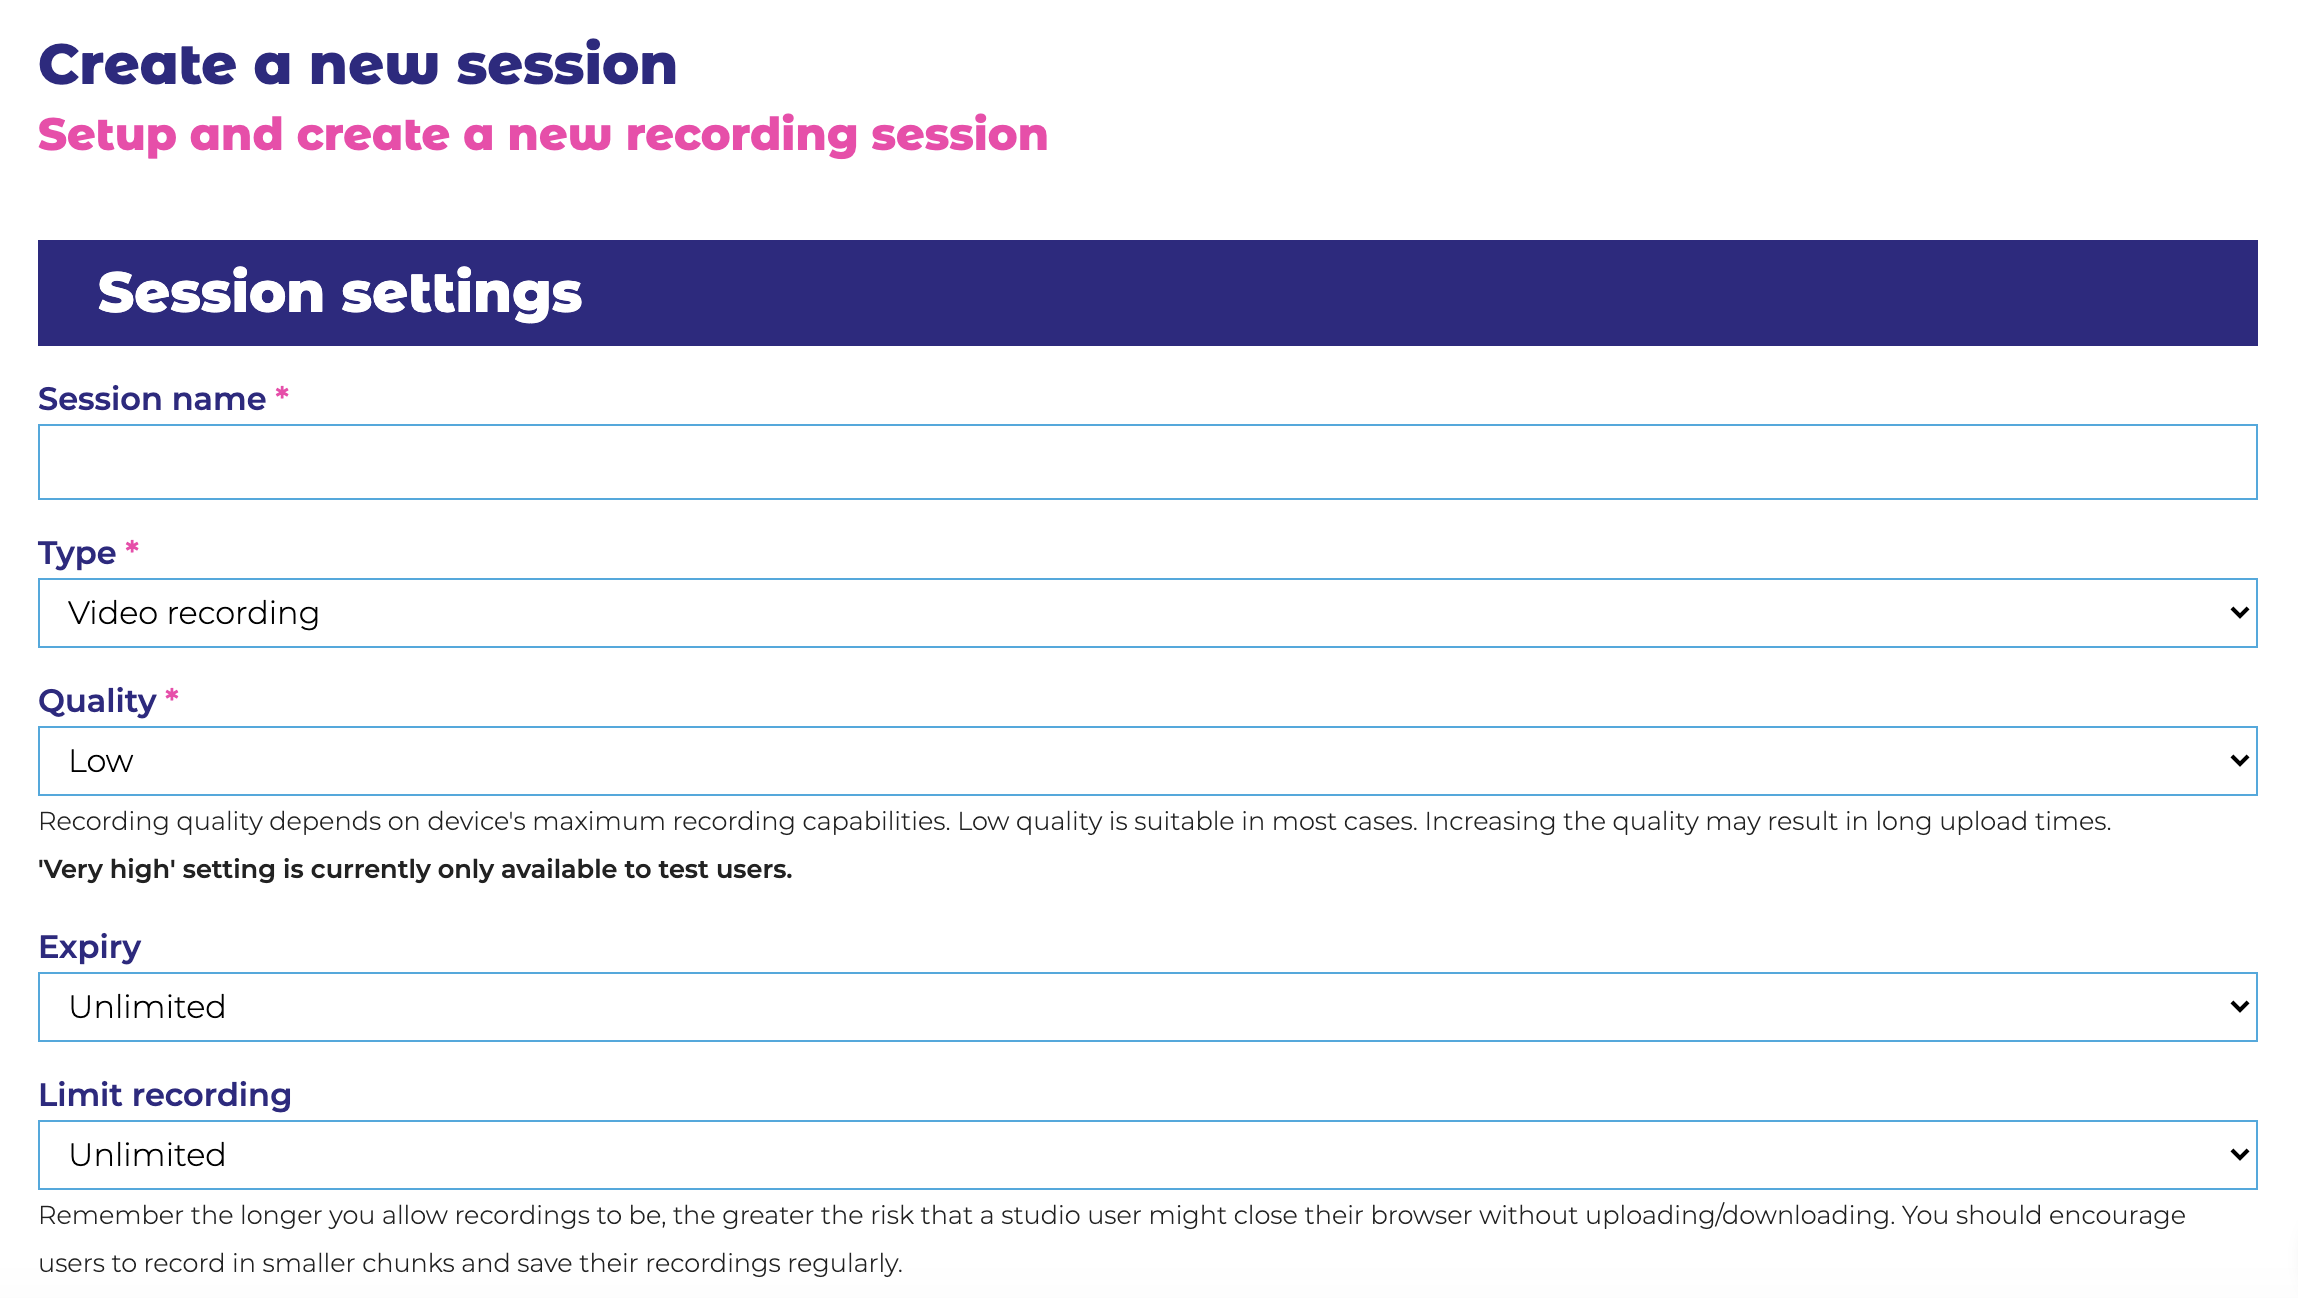
- Give your Session a name
- Choose the session type (Video, Audio or Screen Recording)
- Choose the quality level (Low or High) - This affects the Mobile App recording sessions only. Low is 720p and High is 1080p
- Expiry relates to how long you would like the session to be open for. You can close it at any time, which will stop people recording and uploading.
- Limit the recording length if you wish.
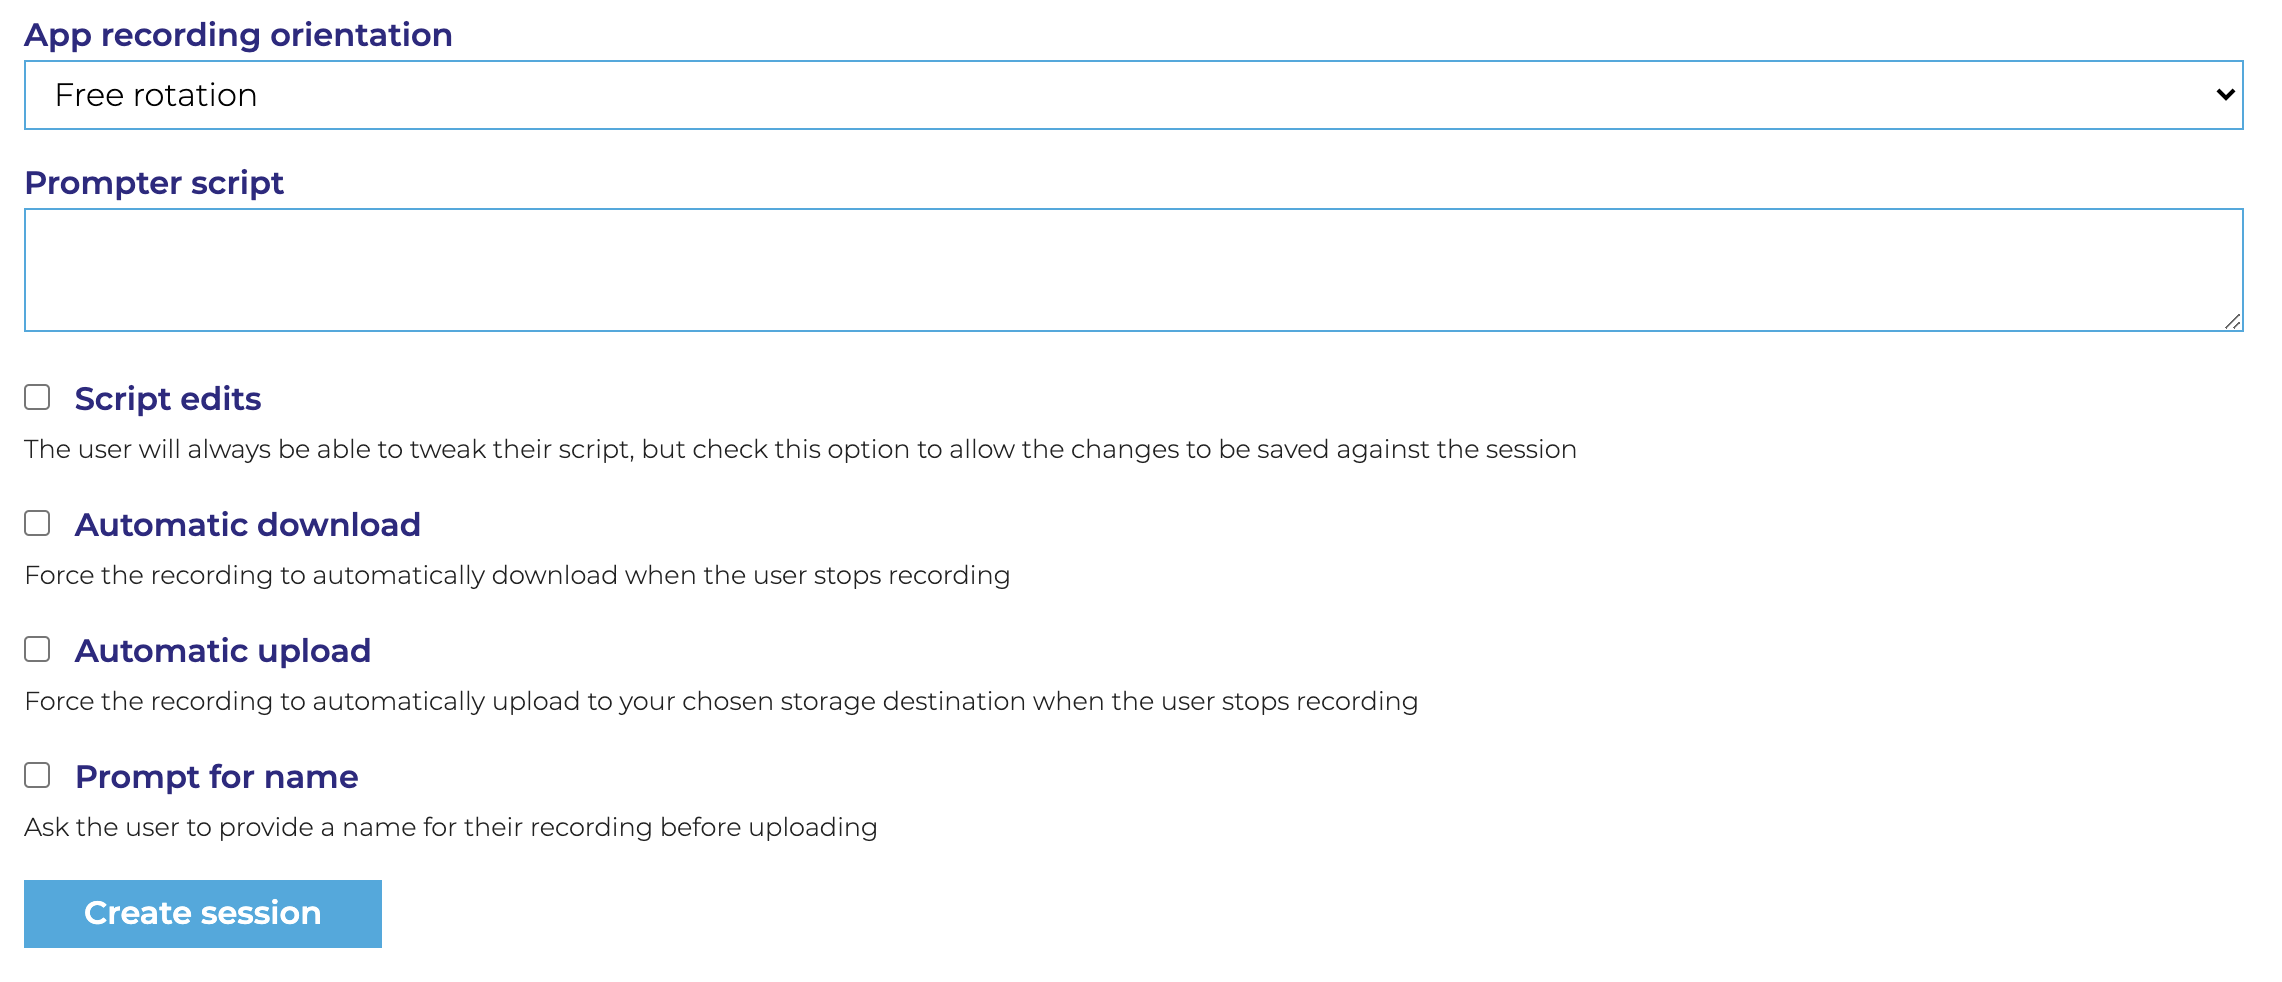
- App recording orientation allows you to specify the aspect ratio in the mobile app. Choose between ‘Free’ to allow the user to determine, ‘Portrait’ and ‘Landscape’.
- Prompter script is where you can add a script for the teleprompter.
- Script edits allows you to sync teleprompter script changes with Camflare’s server. If you are sending this session to more than one person, then keep this unticked.
- Automatic download saves a copy of the recording made in our in-browser studio, directly to the users computer when they press stop. It’s a great fallback if something goes wrong.
- Automatic upload transfers the recording back to your Dropbox when they press stop. This is a great way to capture all the takes.
- Prompt for name allows the user to input a name for the file, which is great for keeping things organised inside of Camflare. This doesn’t affect the actual file name within Dropbox, which is always labelled with the date, time and take number.
Once you’ve completed your settings for this session, just click the ‘Create session’ button and you’ll return to the ‘Sessions’ page, which will show your newly created session.
You will see the name of the session, the type, when it expires and how many recordings are connected with the session.
You will also notice an 'Edit' button to tweak your settings and an 'Invite' button to send details to your contributors.
It’s simple to connect a session with the contributors you want recordings from.
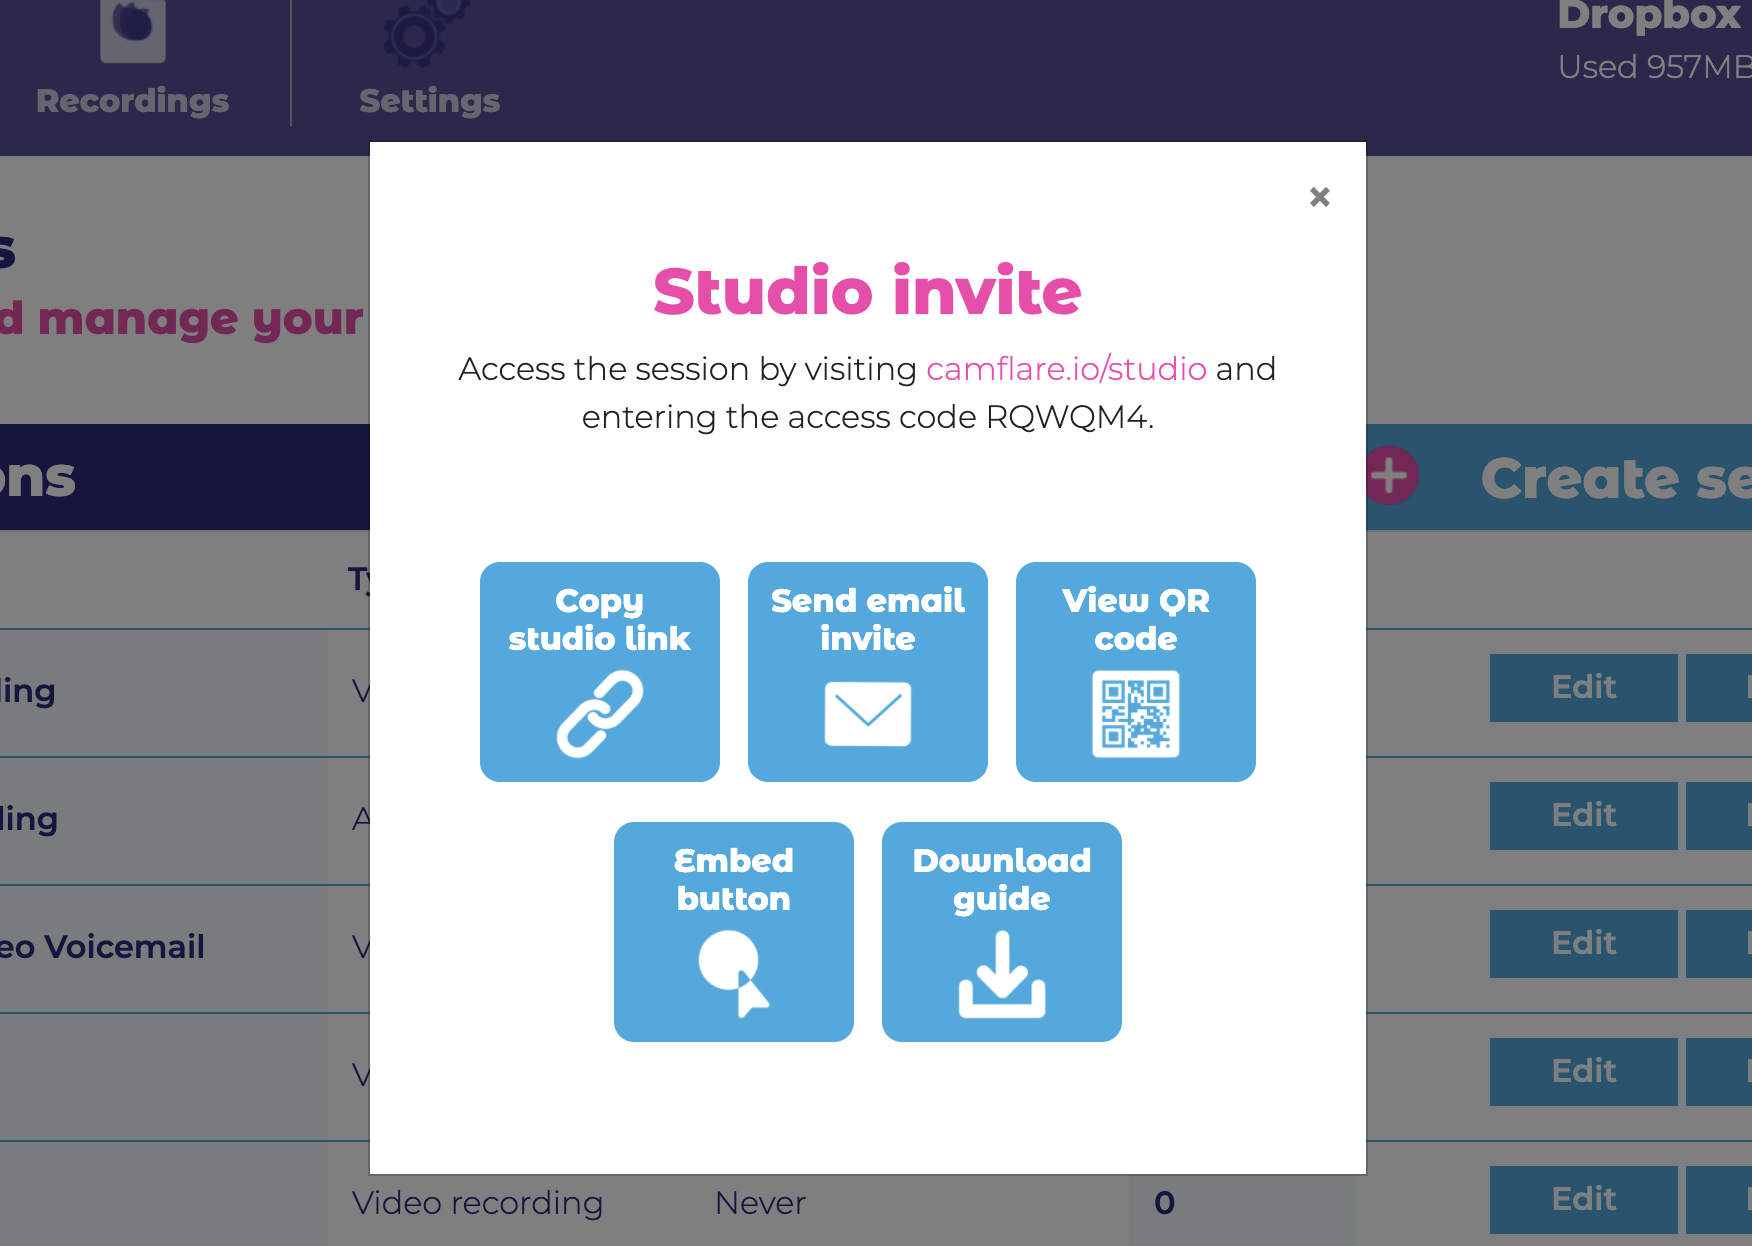
Click the ‘Invite’ button and you will be presented with 5 options.
- Copy studio link will copy the unique session link to your clipboard, which you can then share
- Send email invite will open your default email program and create an email with the embedded link, ready to send
- View QR code will direct you to a unique QR code which you can save or print out
- Embed button is a handy button for your website or blog, just copy and paste the html
- Download guide is a handy recording guide, which you can download and send to your contributors
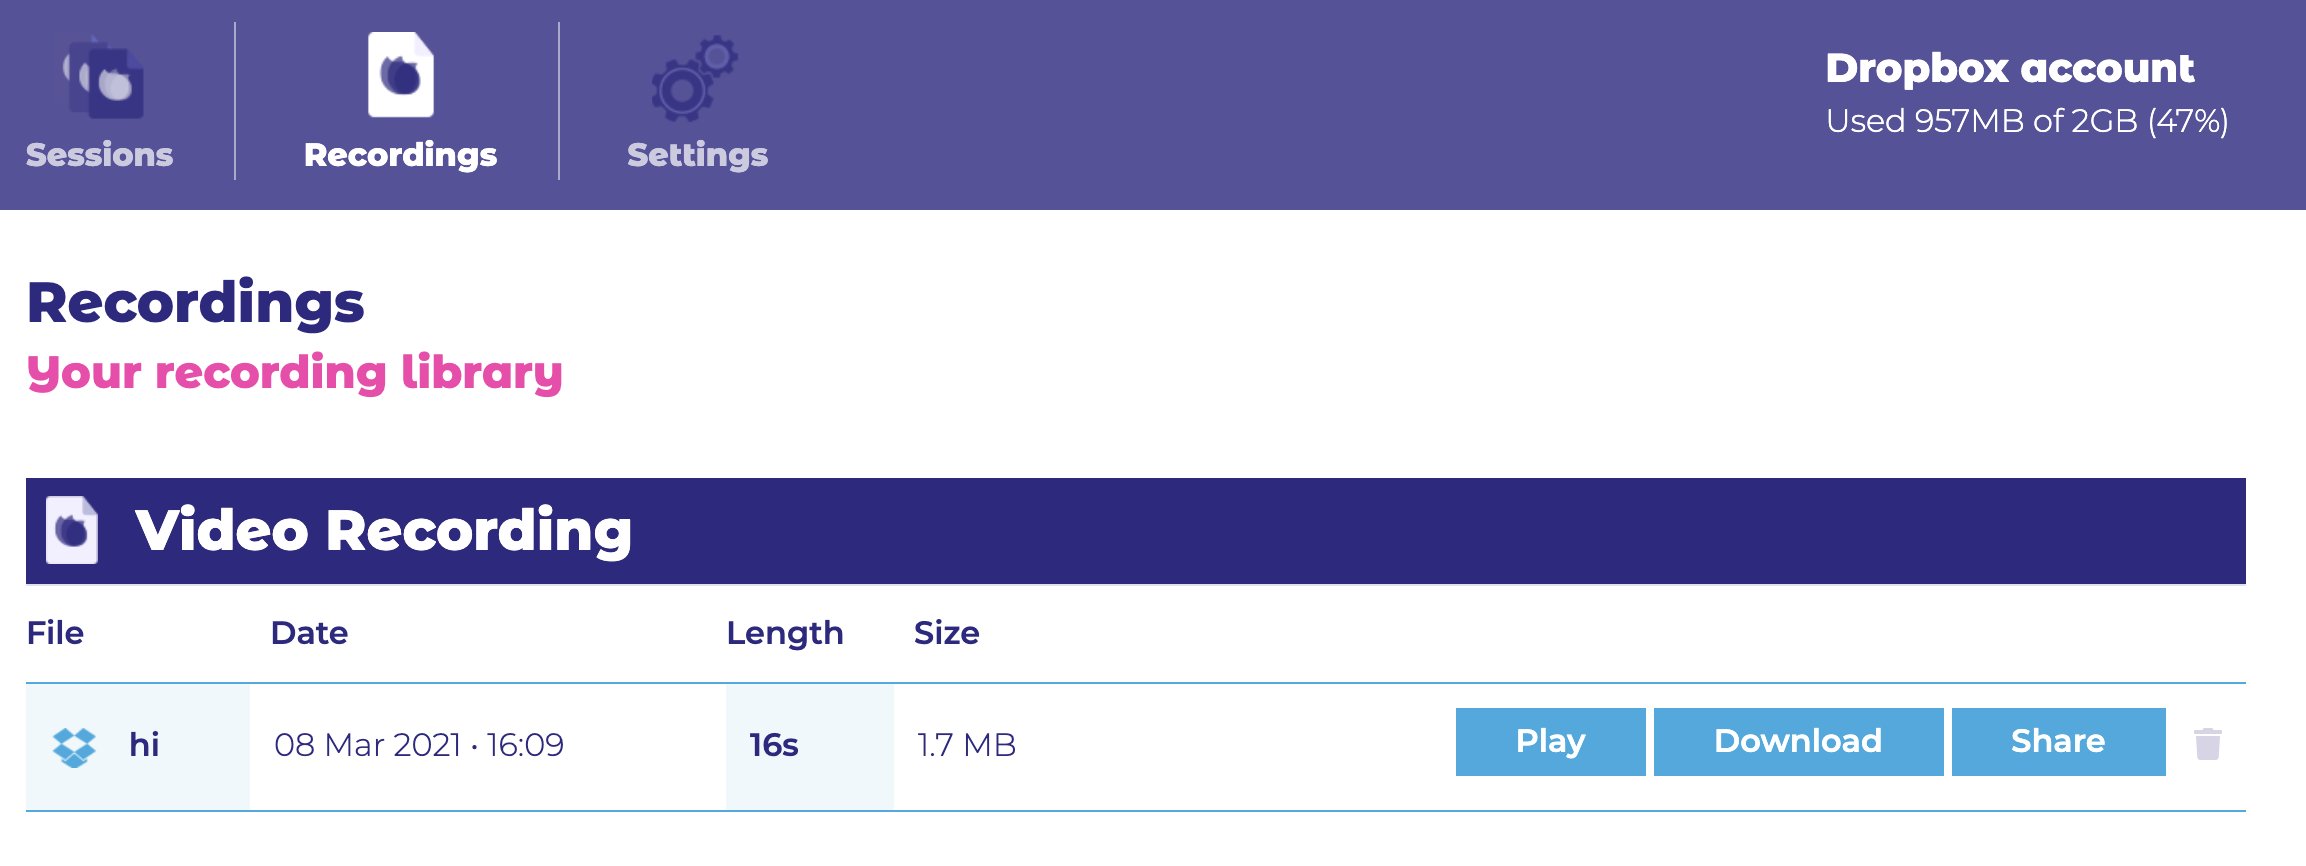
When a contributor has uploaded a recording you will get a notification at the top of the page.
Click on ‘Recordings’ to be taken to the latest files.
Click ‘Download’ or ‘Play’ to view the file directly in Camflare, this works for recordings made via our web browser recorder, older iPhones and Android devices.
*To access files recorded with the latest iPhone devices, then either download the file or view directly in your Dropbox account.
You can also share any of the recorded files with anyone, even if they don’t have a Camflare or Dropbox account.
Simply click the ‘Share’ button and copy the unique link.
The recording format you are sent depends on the recording device and the type of session that’s been created.
All the files are industry standard.
Video:
In-Browser Recorder - .webm @ 720p
iPhone - .mov @ > 1080p
Android - .mp4 @ > 1080p
Audio Only:
In-Browser Recorder - .wav
iPhone - .wav
Android - .wav
*.webm can be viewed in Google Chrome and VLC. You can easily transcode a .webm file to .mp4 using www.handbrake.fr or VLC for ingestion into popular editing software.
You now have all the information to set up a Camflare session and send a link to your contributors.
It’s incredibly easy.
And remember, one link can be sent to unlimited people and it will automatically open the relevant studio to the device they are using. It doesn’t matter how many people record at the same time, it just works!
If you’re already a Camflare user, thank you. The team and I really hope you enjoy the simplicity of our platform and hope it makes your life easier.
If you haven’t yet signed up, then you can do this for free and try us out.
The trial account is limited to 30 seconds for each recording, but it will demonstrate how much time and money this will save you in the long run.